Friday, February 25, 2011

tattoo machine

Beneath The Skin 83


Beneath The Skin 82


Finally finished the tattoo machine for the "Beneath the Skin" exhibition in Sheffield next month! I'm so relieved at getting this main part completed and I can now concentrate on the supplementary pieces which are also going to the show.

The missing ring from my previous post turned up - at the bottom of the ultrasonic tank. It had slipped off the hook and while I didn't remember taking it out of the tank, assumed that I had when it wasn't there. That'll teach me! Two rings for the collection are now also complete:

Beneath The Skin 81


I've a few more pieces in the same style to work on:

Beneath The Skin (WIP) 76


I'm not really sure that I've enjoyed this process: it has been very constrained - no found objects, no corroded iron, only one type and shape of gemstone - and has taxed my ingenuity. What I have learned from it is that when I am working on one of my more usual pieces, I have a tendency to improvise on the sketches and probably rely on that improvisation to create what most people would see as my "style", even when the finished piece looks a lot like the drawings in the sketch-book.

Wednesday, February 23, 2011

Aaaaaaaaaaaargh!

I am SO annoyed. I had just finished cleaning and polishing these rings:

Beneath The Skin (WIP) 68

when I managed to completely lose the one on the right with the heart. I have turned the workshop upside-down and can't find it. It is getting to the point where I would actually be quicker making another! These rings are part of my collection for the "Beneath The Skin" exhibition in Sheffield, of which the tattoo machine is going to be the centrepiece of my section.

FORTUNATELY, the tattoo machine is going much better!

I tried out the finished plate which will adorn the side of the machine to ensure that it all fitted:

Beneath The Skin (WIP) 72


It does! Which is just as well as I couldn't cope with having to remake this.
Just as well I had taken photographs of how to assemble it:

Beneath The Skin (WIP) 71


Today was also the first time I used Daikon radish to prepare the metal surfaces properly... what a stench!

Beneath The Skin (WIP) 73

Beneath The Skin (WIP) 74


The piece is now soaking in hot Rokusho:

Beneath The Skin (WIP) 75


More photographs tomorrow or Friday, plus some of the other pieces which will be part of the exhibition.

Thursday, February 17, 2011

getting to work at last

Finally got the colouring of the Japanese alloys working, so can now start on making the components of the pieces for the show in Sheffield.

Beneath The Skin (WIP) 60

These hearts are made from high-purity Copper, with 25/75 Ag/Cu fused to the surface, then press-formed. The idea is that on colouring in Rokusho, the copper will turn a deep red and the shakudo will go a deep grey.
I also cut the baseplate for the tattoo machine today:

Beneath The Skin (WIP) 62

The metal is a shakudo alloy of 3/97 Au/Cu which should go a deep blue-black. The fine silver skull will stay white, polished silver. I read an article today which said that Japanese craftspeople who work with this material aim to colour it "like a wet crow's wing", which I think is rather lovely.
Details of the baseplate will be picked out in sterling and various different shibuichi alloys and there will be stones set on it too.

Wednesday, February 16, 2011

old crocks

Just got back from an excellent weekend in Brighton!

Seafront Night

Most relaxing. Didn't do very much, which is my favourite long-weekend.


Back to the grindstone today, playing about with these Japanese alloys. Just before I went on holiday, I was having problems with an ochre-coloured deposit on the metals and copper plating: I guessed that this was caused by iron in some way - a hazard in my workshops, where old bits of iron are as likely to be on the bench as precious metals.
Cleaning everything up made a huge difference to the samples and I even achieved some very deep colours on the Shakudo alloy:

Beneath The Skin (WIP) 57


The "Polish - Rokusho Only" bag has a strip of Shakudo at the top which is actually deep, deep blue. I'll be trying to achieve that again!

One of the problems is prolonged heating of the solution which has to be done in a glass or copper container and the concentration has to be maintained. Today, I tried using an old slow-cooker to do this and it worked very successfully:

Beneath The Skin (WIP) 58


This is Niiro solution, being held at around 60-70 degrees C. The Rokusho needs to be held at almost boiling, which this device does when set on the "high" setting.

Tonight, I am trying a suggestion from James Binion's website and leaving the metal in hot Rokusho overnight to turn the copper deep red. More about that tomorrow.

The skulls from last week are now cleaned up and ready to use:

Beneath The Skin (WIP) 56

Tuesday, February 08, 2011

Saturday, February 05, 2011

digital mills and press-forms

Continuing with the "Beneath the Skin" work, all that messing around with the digital scanner and the Polymer Clay models was to give me a press-forming die, of which I now have two, one with the heart at 25mm and 5.6mm deep...
The negative image into which the metal will be pressed.

Seen from behind, the positive image.

...and a larger one with the heart at 35mm long and about 8.3mm deep.
 These were tested out and formed little copper versions of the hearts, exactly as planned:


The copper here - small heart - is 0.4mm thick. The larger heart needs to be pressed from 0.6mm thick or it splits due to the depth of the press:


This project is all about using traditional Japanese alloys and colourings to create pieces and one of the features of the original heart drawing (shown in the previous post) is that it has very prominent black bands defining the chambers of the heart. I am planning to do this by using silver applied to the copper before it is pressed. This, obviously, gives problems of metal thickness and lining up the applied metal to the mould. In order to do this, I used locating pins on the moulds to allow the applied sheets to be lined up correctly:


The silver fused to the surface of the copper. I decided not to solder it as the solder was too visible at the edges of the silver elements.


Using a guide to drill the holes to ensure that the pattern lines up.


The location pins in the mould.

As the dies are relatively deep, they were pressed very gradually, with frequent annealing: the larger heart took 6 anneal-press cycles to attain the full depth of the die.


After the initial few presses.


The finished hearts, waiting to be cut out, coloured and used in the pieces.

Wednesday, February 02, 2011

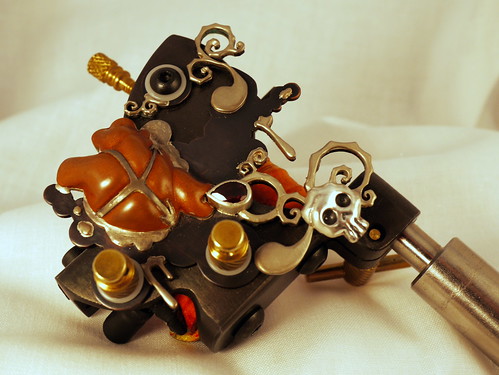
Working on my new project, the customised tattoo machine and associated jewellery pieces, "Beneath the Skin". This project involves a collaboration between me, a tattoo artist in the US, an Argentinian maker of tattoo machines and a metallurgist in Sheffield! It is going to be exhibited as part of the "Galvanize Sheffield" exhibition.

This week, I've been converting the drawings into 3D forms by various manual and digital means. The original drawings from 
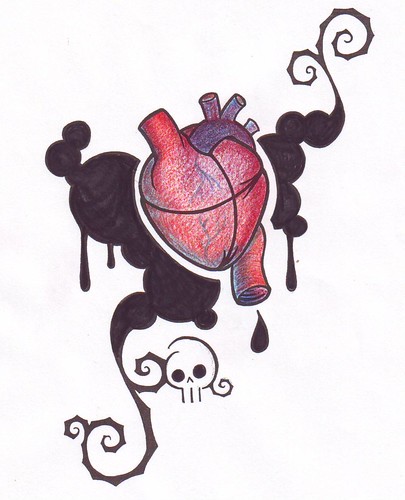
Zook look like this:

Beneath The Skin Workbook 5

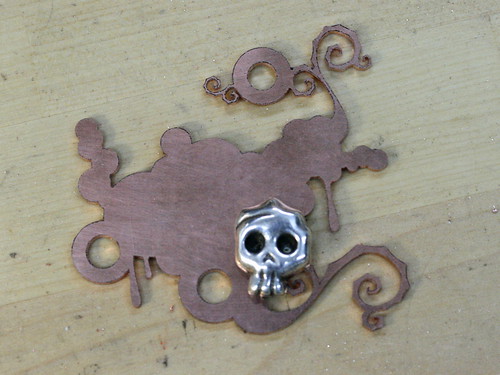
(Yeah, I know that "Beneath the Skin" is being interpreted somewhat literally!)
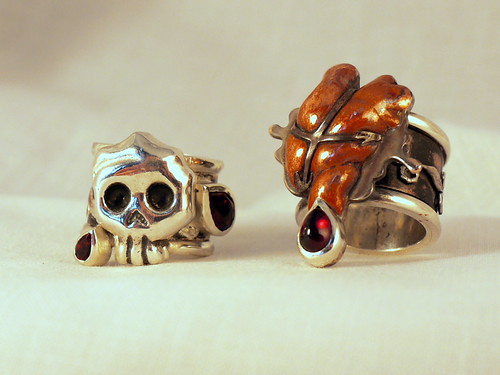
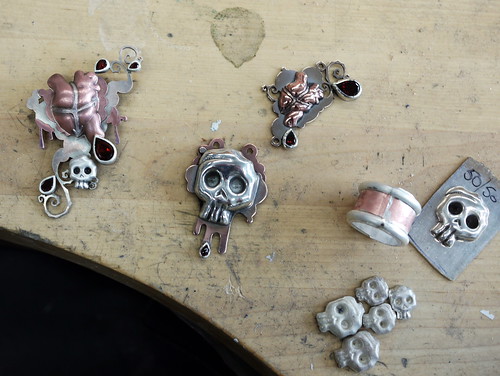
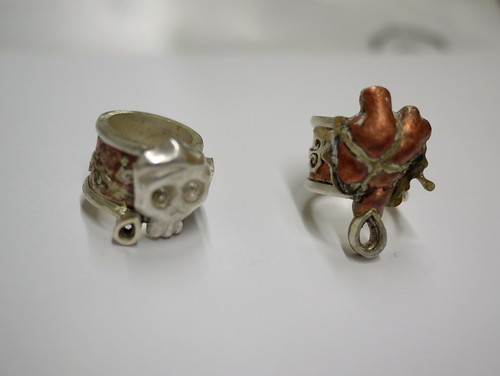
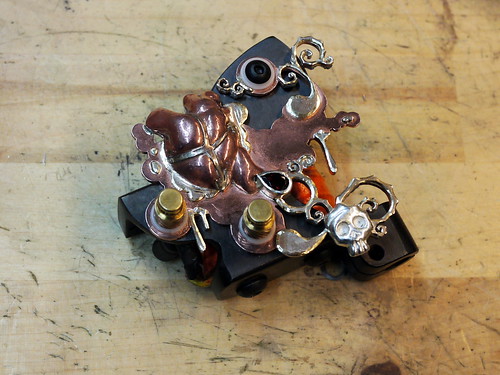
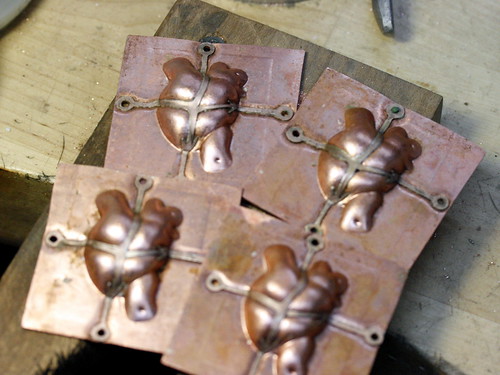
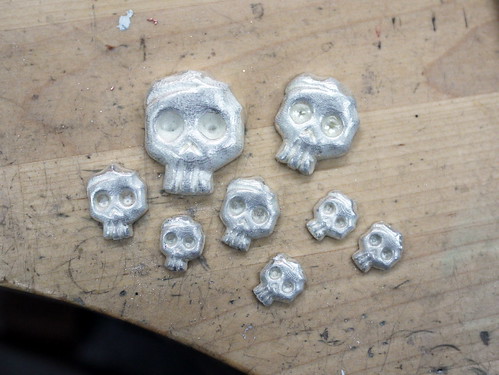
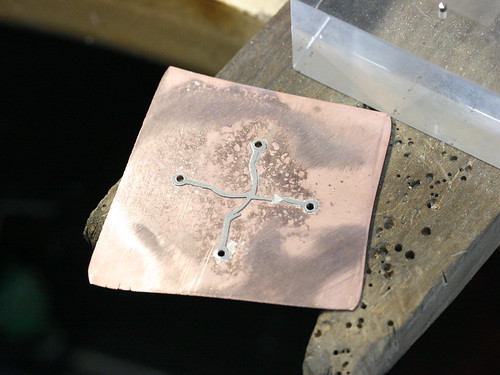
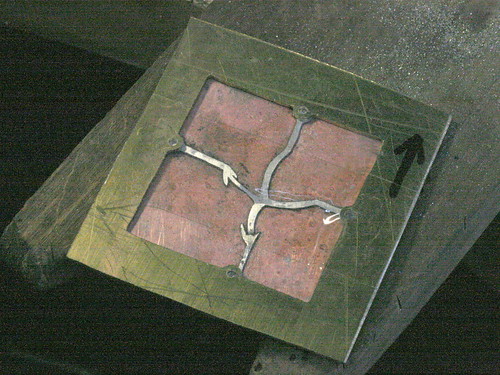
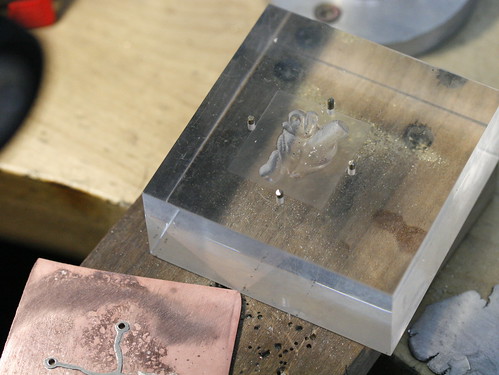
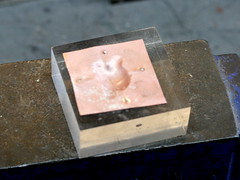
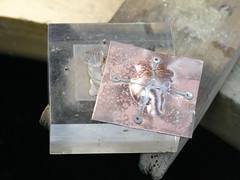
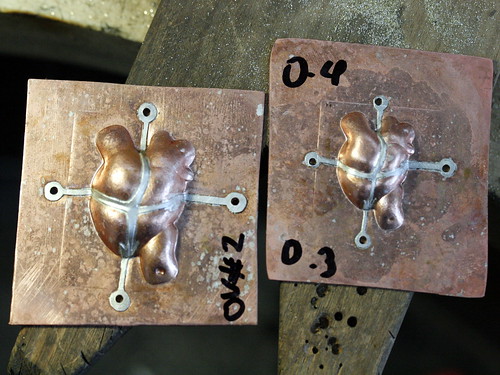
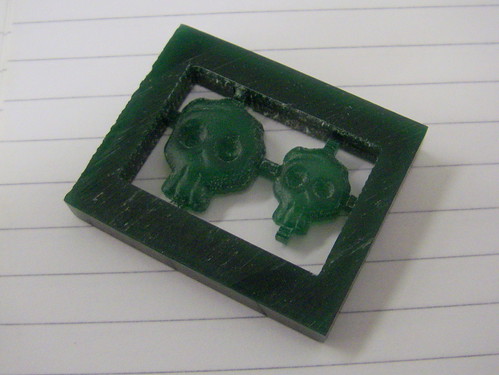
I wanted to render the drawings in metal and decided to press-form the heart in copper, which could then be patinated, and cast the skull in fine silver, which would not patinate. The background will be made from a copper-gold alloy, Shaku-do, which can be patinated to a rich violet-black. Other details will be in other Shibu-ichi type metals. While this is a vast departure from my more usual style, I will still be incorporating gemstones where possible.

Initially, I tried to make the heart and skull as purely digital models, but my main software package is Rhino and the "organic" modelling tools in that are not particularly good. A crash-course in Blender also told me that this was not the way to go! The solution?

Beneath The Skin (WIP) 16


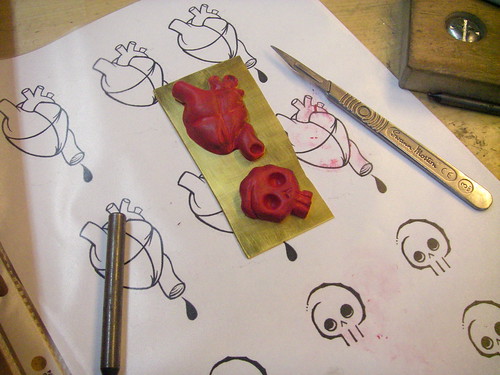
I modelled them in Polymer Clay!
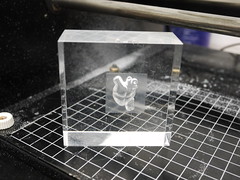
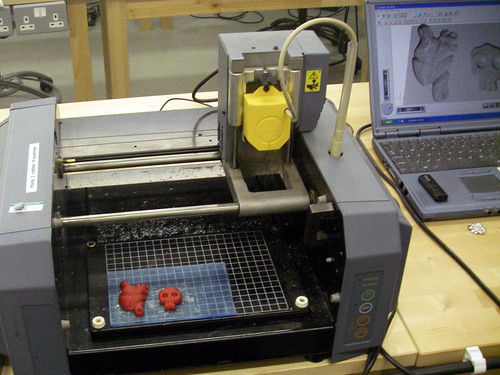
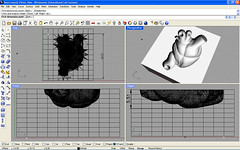
Then baked them and put them into my 3D scanner to create the digital model:

Beneath The Skin (WIP) 17

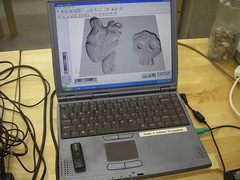
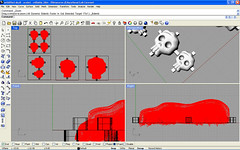
This digital model can then be manipulated and ultimately milled out in a milling machine.

Beneath The Skin (WIP) 18
Beneath The Skin (WIP) 19
Beneath The Skin (WIP) 20


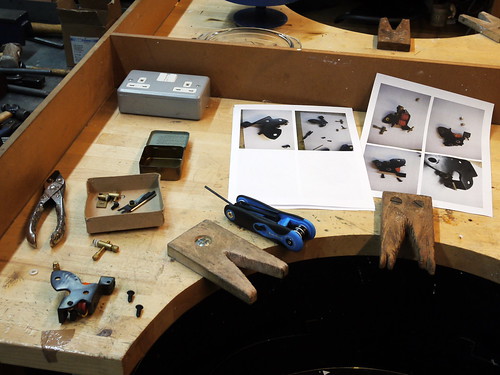
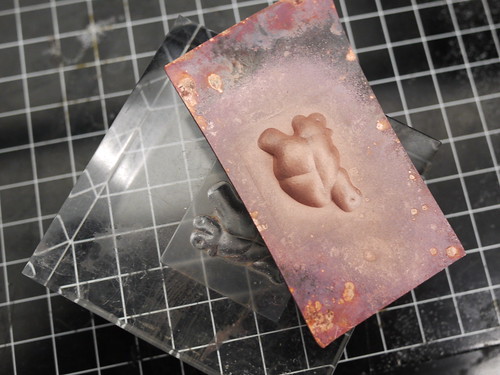
The heart is being cut from acrylic as a conforming die for press-forming. The skulls are being milled in wax for casting:

Beneath The Skin (WIP) 21

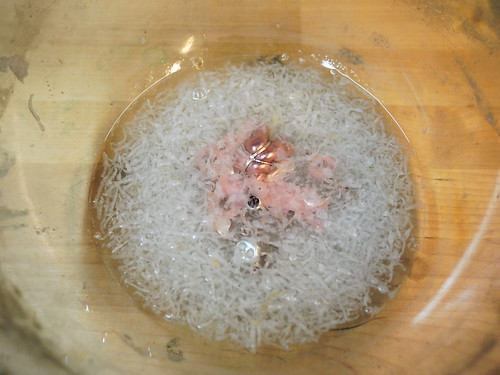
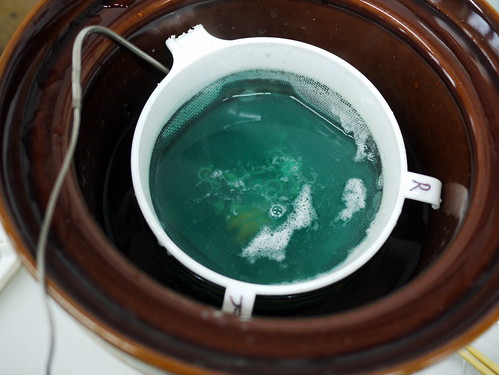
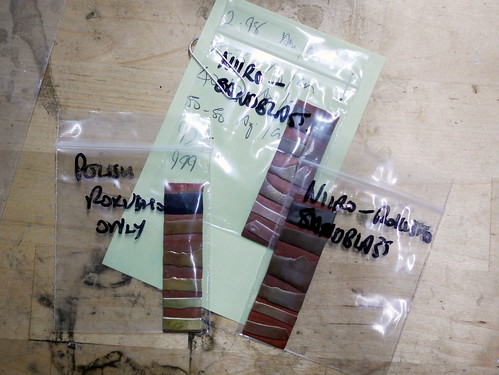
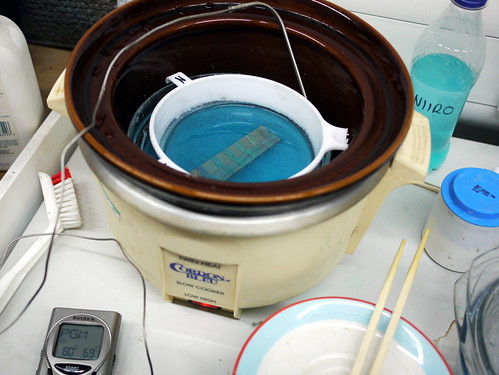
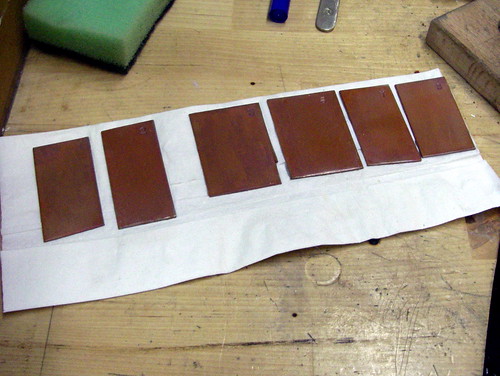
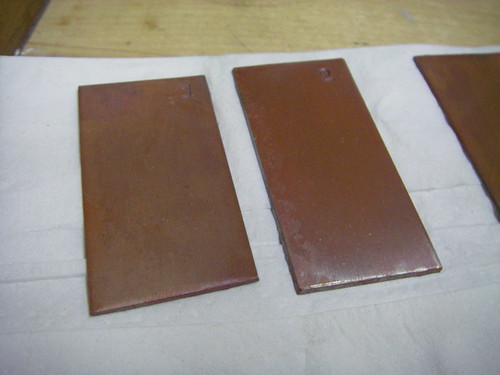
The main purpose of the show is to look at ways of using traditional Japanese alloys and the patination thereof, so I started work on the test samples for the pieces today. I'm trying to achieve that deep cherry-red which appears on many Japanese metal items, which I know to be on a pure copper surface. I managed a muddy reddish-brown!

Beneath The Skin (WIP) 22


Beneath The Skin (WIP) 23


Beneath The Skin (WIP) 24


In the above samples, the copper has been heated in Niiro solution for 1 hour. The first two pieces are samples to be left as is; the subsequent pieces will be treated further in various ways. Sample 1 (left) is heated in plain Niiro; sample 2 (right) is heated in slightly acidified Niiro with tannin - I was trying to emulate an umeboshi plum as I couldn't get to the Japanese supermarket! The second one definitely has a richer colour.