Friday, September 30, 2011

innocent when you dream

I didn't really get a lot done today. Too busy dealing with other things and the students!
I did make a mould of the pewter hawk's foot, using a 2-part silicone rubber compound and making it into a 2-part mould by a very rough-and-ready technique:

Fashion:Victim - In Memoriam ALMcQ (WIP 44)


I used this stuff before and it is surprising the way that a really terrible-looking mould can give a pretty good result. It hadn't fully cured at the end of the day today, so I'll not be able to try it until Monday.
Cast up some of the talons for The Illusion of Freedom Buys The Power of Destruction, one of the balls which will be part of Fashion:Victim:

Fashion:Victim - In Memoriam ALMcQ (WIP 45)


Also drew up the layout for the sphere in Rhino:

Fashion:Victim - In Memoriam ALMcQ (WIP 46)


Everyone at work has been laughing at this brilliant error of judgement seen in Sainsbury's by Russell Elder:


Thursday, September 29, 2011

starry-eyed

Starry-eyed!

Starry-eyed


It struck me today that I have been using a tip bench trick for ages now which I have selfishly not shared with anyone, not out of malice or self-interest, but simply because I use it so very regularly that it never entered my head until one of the students mentioned today how unusual it was. The idea originally came from another one of my students who asked me why there are no tube cutters for jewellery of the sort plumbers use to cut pipes. Her partner is a plumber and he gave me a plumber's tube cutter to try out. This is what I developed.

1) Mark out the length of tube required.

Fashion:Victim - In Memoriam ALMcQ (WIP 37)


2) Use a plumber's "heavy duty mini-cutter":

Fashion:Victim - In Memoriam ALMcQ (WIP 38)


3) Clamp the cutter onto the previously-marked line, ensuring that the line is directly under the cutting-wheel:

Fashion:Victim - In Memoriam ALMcQ (WIP 39)


4) Rotate the tube in the device several times, tightening the clamp slightly each full turn. I don't use this tool to cut right through the tube as it tends to leave an outer bevelled edge and an inner flange which have to be dealt with:

Fashion:Victim - In Memoriam ALMcQ (WIP 40)


5) This leaves a lovely, clean, deep groove which is absolutely straight all the way around the tube:

Fashion:Victim - In Memoriam ALMcQ (WIP 41)


6) I then use a saw in a standard tube-cutting clamp to cut the tube off through the groove, rotating the tube as I cut:

Fashion:Victim - In Memoriam ALMcQ (WIP 42)


This method allows for much more even cutting of tube, less sawblade breakages and fewer blades blunted by rubbing against the standard clamp. I've used it on very tiny tubing and although this clamp says it will go down to 1/8", I've managed to mark out tubing just over 2mm OD.


Didn't get much done today other than making the other hinge for the sphere:

Fashion:Victim - In Memoriam ALMcQ (WIP 43)


And cutting out some stars for the "poles" of the spheres.

Fashion:Victim - In Memoriam ALMcQ (WIP 44)


As I mentioned yesterday, I found a very interesting blog because the owner kindly emailed me to say that my ring made from the corroded hex-nut features on her Industrial page.


As she says on the front page of her blog,
All the cute and the precious have been found. All the kitties and puppies have homes. The candy colored, the eco-friendly, the hipsters of the handmade are all duly covered elsewhere. Here I will find the slightly odd, the darkly beautiful, the elegant and steamy pieces of goodness.
Very refreshing!

Wednesday, September 28, 2011

lots of stuff!

Just back from a long weekend in Brighton.

Brighton Rock

All the usual nonsense! Charity shop hilarity in the form of sickening ceramics:

Sickening trash

And Dingo getting in the way of the camera on purpose:

Dingo Interferes


If you half-close your eyes, you can see that it is him.
I got a good chance to play with the new macro lens, which has really become a firm favourite as it is super-sharp (as it should be, being a Leica lens) and although it is not fast - at f2.8 - is incredibly flexible. I could see myself using only three lenses in the future: the 20mm f1.8 Panasonic Pancake, the 25mm f0.95 Voigtlander and the 45mm f2.8 Panasonic-Leica macro.

Paeonia sp.


I have received two lovely emails today from people who have featured my work. One is on a site which selects what the owner believes to be the best of Etsy - and a quick look at her blog convinces me that she has excellent taste:


And the other is from a blog which is all about old Hillman cars, Paykan Hunter.


Back into the workshop for more on Fashion:Victim. Both the ball elements are nearly ready for development into finished pieces. The hinges are completely on one and the other has the main structural elements for the hinge in place - should be hinged tomorrow:

Fashion:Victim - In Memoriam ALMcQ (WIP 34)


Fashion:Victim - In Memoriam ALMcQ (WIP 35)


Fashion:Victim - In Memoriam ALMcQ (WIP 36)


Additionally, I've been working on some cast elements for these, including the "talons":

Fashion:Victim - In Memoriam ALMcQ (WIP 31)


Fashion:Victim - In Memoriam ALMcQ (WIP 32)

And the little holders which will hold the recycled rare-earth magnets (from discarded ultrasonic toothbrush heads) for use as catches for the spheres:

Fashion:Victim - In Memoriam ALMcQ (WIP 33)


These were drawn in Rhino and milled out for casting. You can't really see on this photograph, but the setting is shaped to conform to the radius of the spheres.

Next problem: how to model this life-sized pewter hawk's foot in hollow silver!

Fashion:Victim - In Memoriam ALMcQ (WIP 30)

Tuesday, September 20, 2011

sign o' the times

One of my students is so hard up just now that he is selling off his gemstones. Normally, I love buying gemstones, but this felt like I was doing something wrong. Still, I gave the (fair) prices asked, so nobody lost out. It is just sad that it has come to this. Hardly surprising as precious metal prices rocket, though I was amazed to see that silver was actually higher in 1980 than it is now, something I only just remember. It was 1980 when the Hunt Brothers tried to corner the market. Alas! this current price hike appears to be directly related to the price of gold and is unlikely to come crashing down again as it did last time. Adjusted for inflation, silver is still MUCH cheaper than it was then but that is little consolation.

Anyway, I am not an economist. The stones I bought were these two. First of all, a slightly-scuffed Zircon of a beautiful bright, blue-green colour, about 10 x 8 mm:

Scuffed Zircon


The scuffs are barely visible with the naked eye and there is a slight bi-colour effect on the stone, which is lovely. The second is this gigantic roughish emerald, about 20 x 16mm:

Roughish Emerald 1


Again, the pits on the surface - this time a "feature" of the stone - are not visible to the naked eye.


Got a bit of work done on Fashion:Victim, starting in earnest on one of the two hanging elements for the bangle, this one The Illusion of Freedom Buys The Power of Destruction. Soldering these is a nightmare!

Fashion:Victim - In Memoriam ALMcQ (WIP 29)

Thursday, September 15, 2011

Gift Horse

One of the other lecturers at work found this hammer in a cupboard in the engineering department:

Raising Hammer


It's a bit rough-and-ready, but I can easily dress it and make it into a decent raising hammer. I especially like the label on it:

Stylish Label


Didn't get much done today as I was busy teaching the students the fundamentals of marking out, which tends to be pretty intense! Managed to get the hinge finished on the bangle for "Fashion:Victim" - the sticking-out elements are settings and will be cut back considerably -  and started to make the threaded catch:

Fashion:Victim - In Memoriam ALMcQ (WIP 24)


Fashion:Victim - In Memoriam ALMcQ (WIP 23)

Wednesday, September 14, 2011

video of falconry bells

I finished another bell today and made a video of how they sound.


 Apart from that, I didn't do too much except make another corroded nut ring to see how it would sell on Etsy:

Another Nut Ring


Set with a natural zircon. (A stone which I personally feel is much underrated.)

Tuesday, September 13, 2011

jingle bells

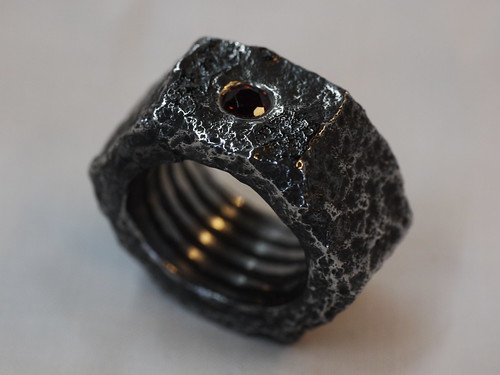
Not that it is that time already, but after posting a request for information about bells on Crafthaus, I finally took on board the advice I was given and coupled it with snippets found trawling through online fora and made a falconry bell. It actually rings, looks the part and is probably light enough that it could actually be used for falconry though it is actually going to end up on my falconry-inspired "Fashion:Victim" piece.
In case anyone is interested in such matters, here is the progress of the bell from start to finish as there is precious little information out there and you never know when you might have to make a bell!

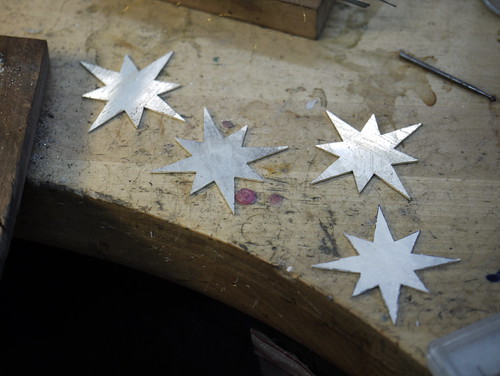
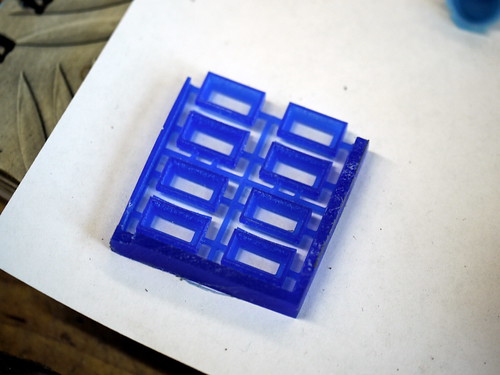
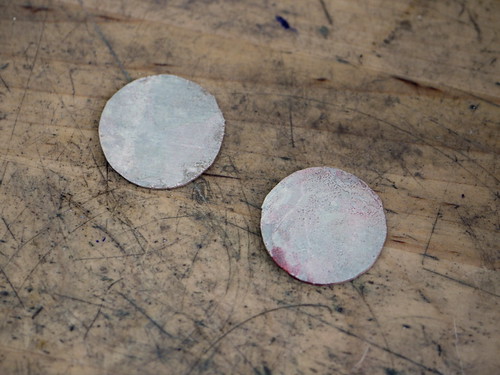
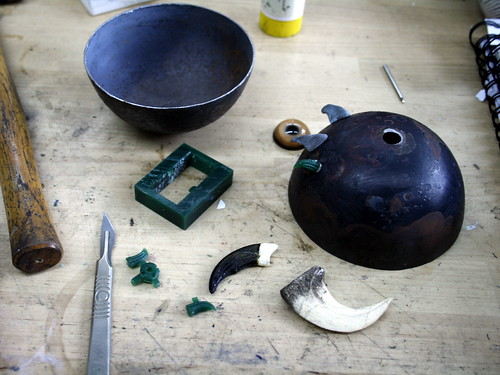
1) Cut some discs. These are about 30mm across and are made from 50/50 Copper/Silver shibuichi. I chose shibuichi as it is harder than sterling when worked:

Fashion:Victim - In Memoriam ALMcQ (WIP 8)


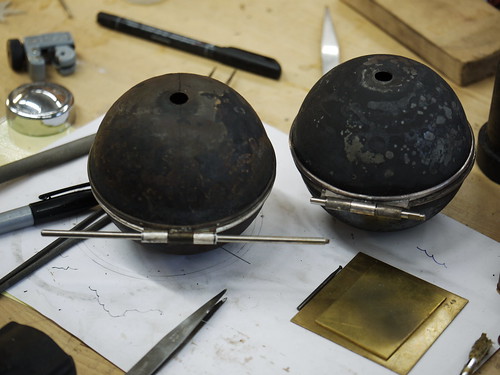
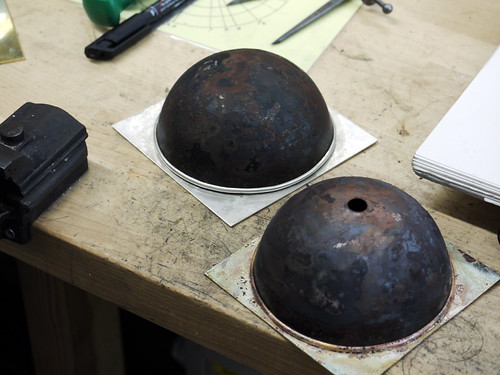
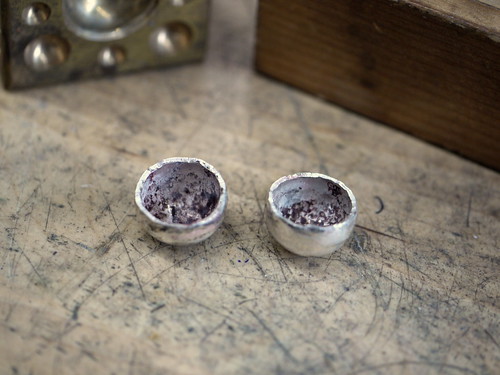
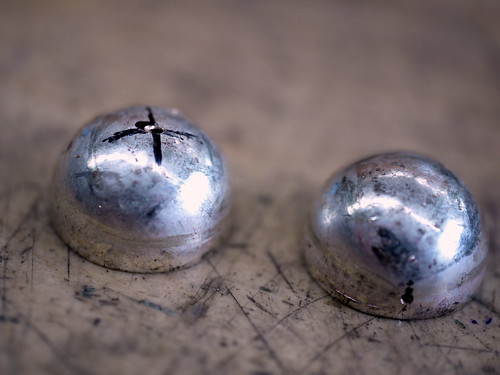
2) Anneal and dome the discs into very deep domes. The falconry bell is also sometimes called an "acorn bell" on account of the shape. I think that it would probably still work if it were more spherical:

Fashion:Victim - In Memoriam ALMcQ (WIP 9)


3) Even up the rough edges and mark the centre of one of them and drill a hole. On the other one, drill two diametrically opposed holes a little way up from the edge:

Fashion:Victim - In Memoriam ALMcQ (WIP 10)


Some people advocate drilling the side holes when the bell is made but I found that needlessly difficult as it would have meant supporting and measuring a quasi-spherical object and drilling it, whilst it is the work of a moment to drill the hemisphere.

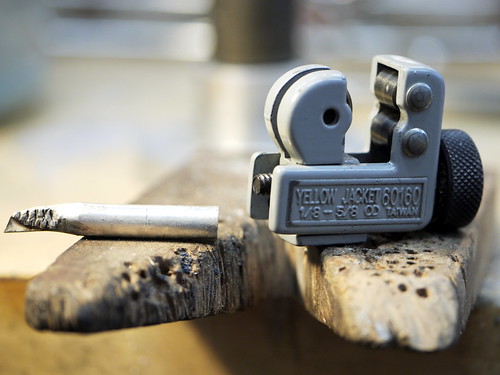
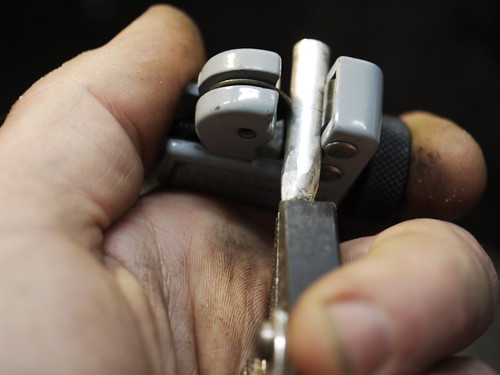
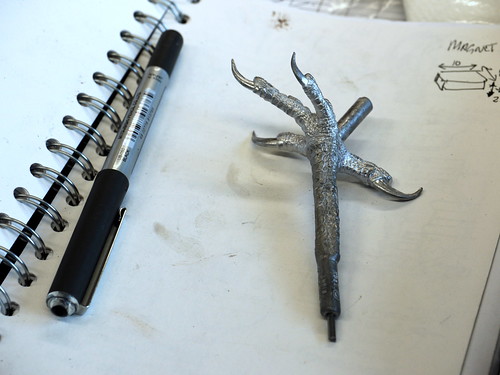
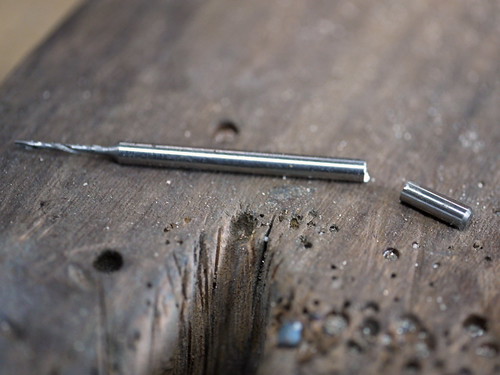
4) Make the clapper. I knew that the clapper should be free to move and that it should be hard. Some comments online suggested that a ball-bearing allowed to move free within the bell would be enough to make a sound, but I thought that a swinging clapper would be better. For a hard material, I cut a piece of tool steel from a blunt drill using a diamond disc:

Fashion:Victim - In Memoriam ALMcQ (WIP 11)


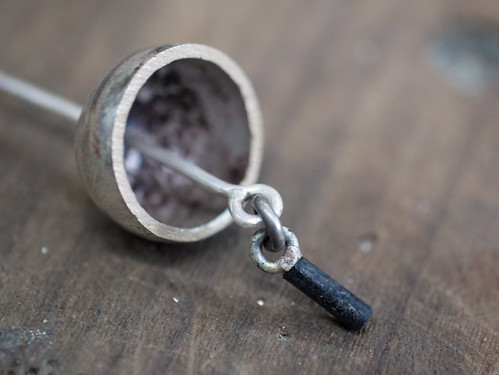
5) Attach the clapper to a free-swinging support. I made a couple of these to see which worked best and this one with the third jump ring in the middle proved to be best. Soldering a jump ring onto the tool steel is a bit tricky, but I used enamelling solder and it works fine.

Fashion:Victim - In Memoriam ALMcQ (WIP 12)


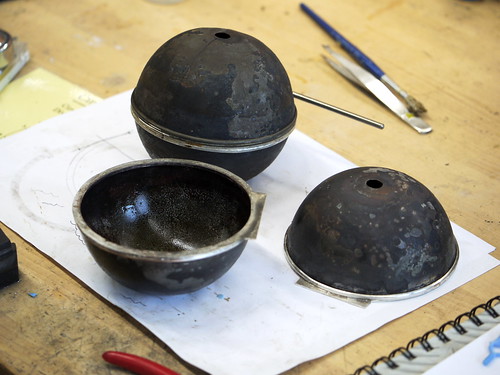
6) Secure the mechanism so that the outer bell hangs freely on the support of the clapper mechanism. This is a really tricky solder to do! I used a LOT of tipp-ex to stop everything sticking together.

Fashion:Victim - In Memoriam ALMcQ (WIP 13)


The outer jump ring will be used to attach the bell to the final piece. It also prevents the clapper from falling inside the bell.

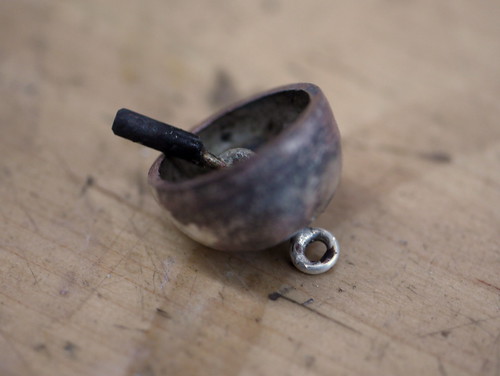
7) Solder the two halves together with the mechanism in place:

Fashion:Victim - In Memoriam ALMcQ (WIP 14)


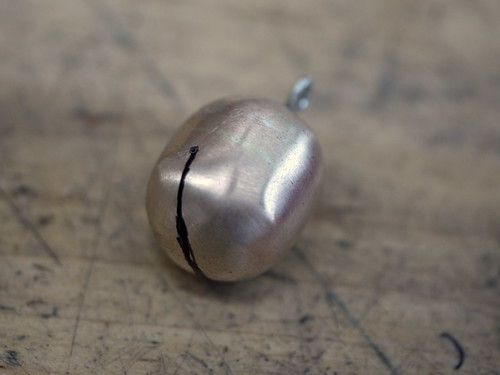
8) Pickle, clean and file, then mark out where the slot is going. At this stage, the bell doesn't ring, it just clicks a bit!

Fashion:Victim - In Memoriam ALMcQ (WIP 15)


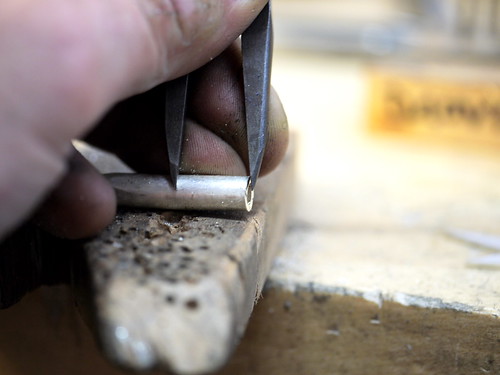
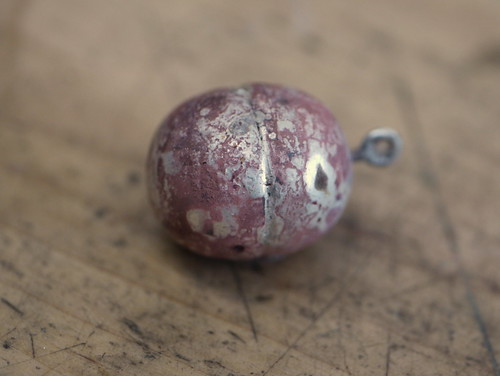
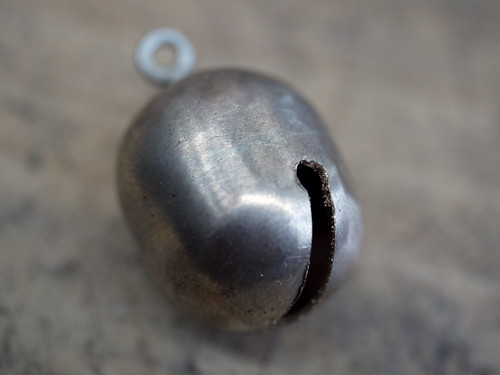
9) Cut the slot and create the holes at the end of the slot to relieve the stress points:

Fashion:Victim - In Memoriam ALMcQ (WIP 16)


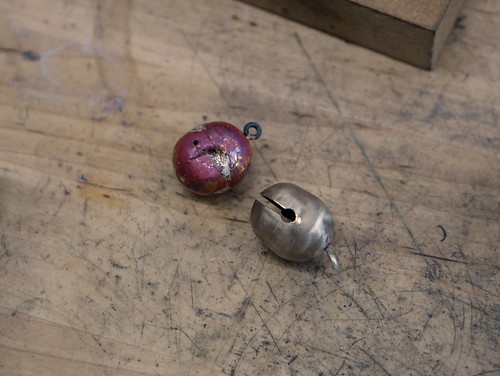
NOW it is ringing! A few more steps to go and the bell will be finished. Before I go on, here are a couple of failures:

Fashion:Victim - In Memoriam ALMcQ (WIP 17)


Left: forgetting that shibuichi and hard solder have similar melting points. Right: Thinking, "I wonder if it would be louder if I made the slot bigger?". It wasn't. It stopped making any noise but a metallic clicking.

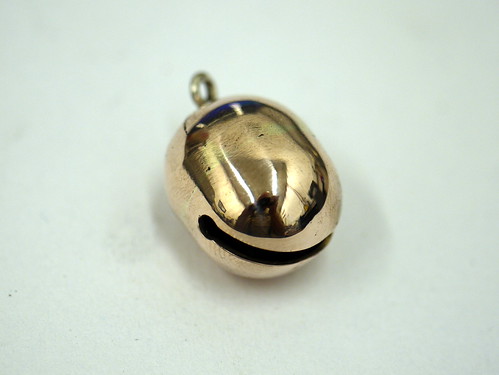
10) Barrel polish the bell and then give it a final manual polish. The barrel polishing hardens the whole thing up and the sound is better afterwards:

Fashion:Victim - In Memoriam ALMcQ (WIP 18)


Fashion:Victim - In Memoriam ALMcQ (WIP 19)


I did make a video of the thing ringing but for some reason, there was no sound on the video. I'll do it again tomorrow and post it then.


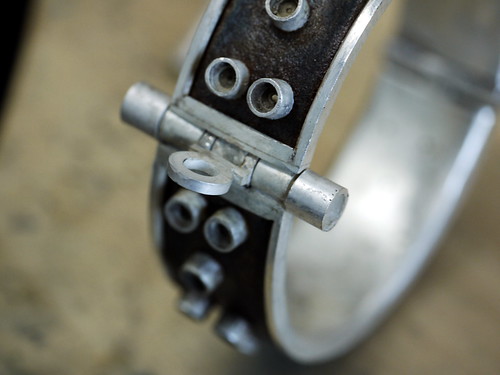
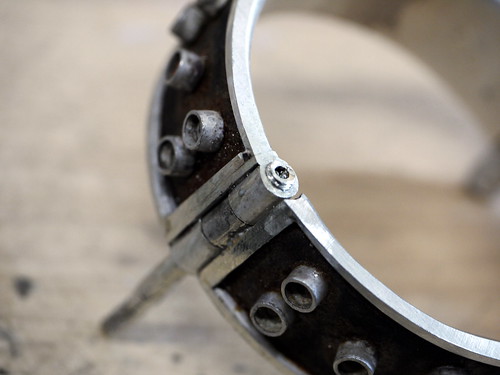
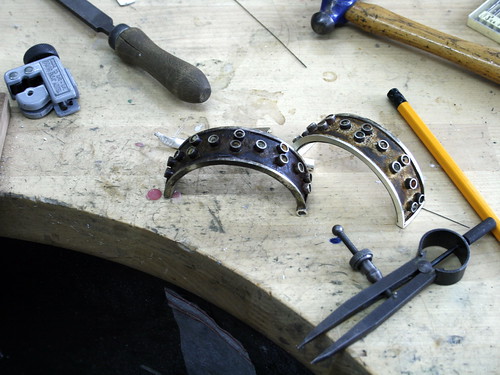
I also got a fair bit of work done on the bangle for this piece, setting the hinges, one of which will be the catch mechanism and making the support for the hanging elements (which will include the above bell):

Fashion:Victim - In Memoriam ALMcQ (WIP 20)

Friday, September 09, 2011

friday feelings

But not in a bad way.
I received an email from the editor of 18kt website today. The editor, Marta Sanchez, had just written an article on my excellent friend and colleague in Italy, János Gábor Varga and he recommended her to contact me, which was generous as well as flattering, so there will soon be an interview on the website.

Got quite a lot of work done on Fashion:Victim today, though it is all a bit slow-going as I'm having to wait until the middle of October for an element of the piece to be carved in Whitby jet by the marvellous Kevin Dixon at 105 Jet in Whitby (it is actually great to hear that he is so busy that he can't manage it until then: so many people are in exactly the opposite situation at the moment). Today, the settings were all affixed to the bangle and it was cut and the hinge begun:

Fashion:Victim - In Memoriam ALMcQ (WIP 7)


Although I'm clear about the basic ideas for the piece and the drawings have been done, there are some practical aspects which are vexing; I wanted these tiny raptor claws made in sintered zirconium oxide, which is the material used for dental implants:

Fashion:Victim - In Memoriam ALMcQ (WIP 4)


Unfortunately the lab I contacted couldn't make them hollow in the way I wanted, so I've had to think about making them in silver. I milled this one out today:

Fashion:Victim - In Memoriam ALMcQ (WIP 6)


I'll cast this, then modify the casting, take a rubber and re-cast it so that I can cover the sphere with the tiny claws (unless I can find another lab to make the zirconia ones).